RFP360 Guide
Simplified Tendering with RFP360
Accessible to pre-selected providers.

Getting started with tender management
Our new RFP management platform „RFP360“ will help you organise and respond to our RFPs. This FAQ will guide you through the first steps and provide basic knowledge about the RFP workflow.
What We are Frequently Asked
FAQ
General
How Can I Register?
1. Check email invitation
Check the inbox of the email address we used to register you to see whether you have received an invitation to take part in the tender. The email was sent from noreply@rfp360.com.
To ensure that our emails are not marked as spam, please add our email address noreply@rfp360.com to your whitelist. This will ensure that you receive important messages and updates from us without them ending up in your spam folder.

2. Initial registration and account activation
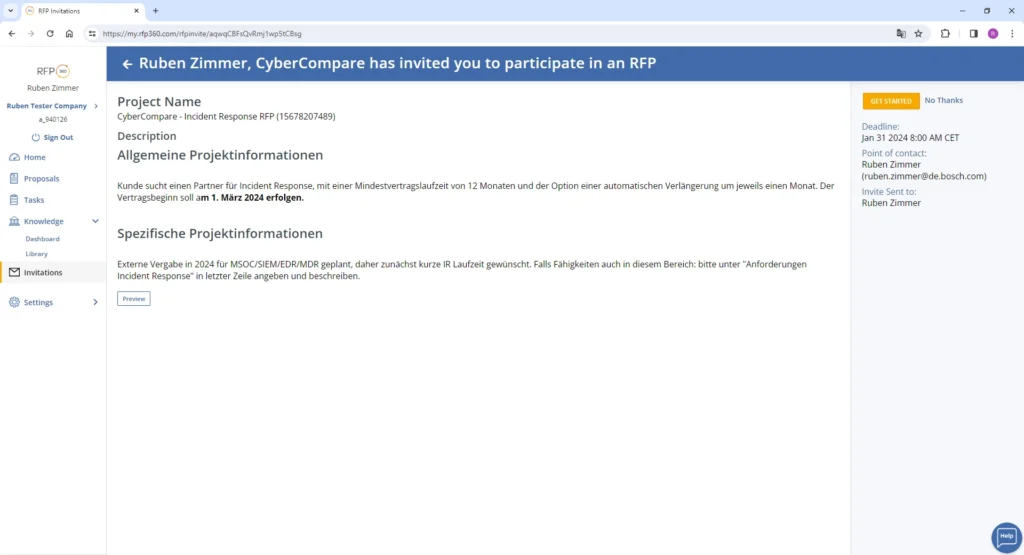
Click on the link provided in the invitation to check your participation and activate your account.

Note: If your phone number is not accepted by the system, you can try: 0000000000 as a workaround.
3. Viewing tender documents and opening the tender platform
After accepting the invitation, you will have access to all relevant tender documents. Please read them carefully. Please note, you have always the option to withdraw the application.

- "Preview" gives you the opportunity to view the complete tender content.
- "Get Started" does not yet confirm your participation.
How to Use the Dashboard?
The proposal dashboard is the overview of one specific tender. Here you can see your progress. On the top right you can find the possibility to continue with the proposal (OUTLINE), export the proposal into a file or submit the finished proposal. You can also message us.

How Can I Reset my Password?
- Visit https://my.rfp360.com/password-recovery
- Enter the e-mail address you used to register
- Click on "Recover My Password"
Note: CyberCompare cannot reset your password. If these steps are not helpful, please directly get in touch with support@rfp360.com
How Can I Request Help from RFP360?
If you encounter technical problems with the tendering platform, you can use the contact us, or contact the RFP360 support team. To contact RFP360, open the chat at the bottom right of the screen.

User Management
How Can I Invite a User/Colleague?
1. Add the User (if they do not exist)
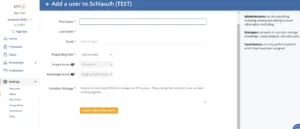
- Please select the "Users" section in the settings
- Click on "Add New User"
- Enter the details of the new user
Note: If the phone number is not accepted, you can try: 0000000000


If desired, you can now add the user to the tender, as explained in another FAQ.
How Can I Add a User/Colleague to a Tender?
Before following this guide, make sure that the user/colleague was already added to the platform.
Your colleagues can be part of the approver and / or writing team. This enables you to stay in control of the proposal.
To add people to the writing or approver team:
- Open the proposal outline.
- Now you can add people either for sections or the whole proposal.
To add team members for the whole proposal, please open the overview mode and select all sections:

-> Now you can “Manage Teams”.
Here, just click “+Add User”. Select an existing user and save!

Tenders
How Can I Make and Submit a Proposal?
The following information can also be found as a video tutorial as part of the official documentation by RFP360.
1. Check invitation and send confirmation of participation:
Under "Invitations" you will find the invitation. Click on the corresponding "Get Started" button to confirm your participation.

After successful confirmation, the tender will be moved to the "Proposals” area (left-hand menu). Here you have an overview of all tenders.

2. Enter your answers & documents:
Complete the required questions and submit them via the platform by the deadline.
You can also collaborate with your team on the tender.
Click on the "Save & Complete" option to save your feedback. Using "Save & Complete" ensures that your submitted information is saved correctly.

3. Submission
Once you have completed your response to the RFP, you can proceed to submit your final proposal. However, there are a few necessary steps to take beforehand:
- Ensure that your proposal is fully reviewed.
- All required questions need to be filled out, and all responses need to be approved to submit.
- Finally, submit your proposal by clicking on the button in the top-right corner.

How Can I Un-Submit a Proposal?
You can revise your proposal before the due date by clicking "Un-submit" in the header inside the proposal. After making changes, remember to resubmit the final version.
A video tutorial can be found here.
How Can I Save Answers for Later Reuse?
To save you time, RFP360 can remember your answers and use them in future tenders. This is a two-step process.
- Save your answers to new questions
- Proposal Automation -> Automatically answering known questions.
Save an Answer
- Save the response as usual with "Save & Complete"
- Click on the "Update Knowledge" button at the bottom right of the question
- Either store the answer as a new record, or update an existing one (first or last option)


How Can I ALWAYS Save Answers for Later Reuse by Default?
To save you time, RFP360 can always remember your answers and use them in future tenders.
To do so, enable "Write Response to Knowledge Base" as explained here:
How do I configure saving to the knowledge library? – RFP360 (zendesk.com)
How Can I Reuse Answers and Answer Questions Only Once?
To save you time, RFP360 can remember your answers and use them in future tenders. This is a two-step process.
- Saving your answers to new questions
- Proposal Automation -> Automatically answering known questions.
The storage part is explained in another FAQ.
Note: Only questions that were explicitly saved can be retrieved.
Option 1 (Proposal Automation)
After creating a proposal outline, RFP360's system analyzes the questions you need to address and finds questions you already answered. To get started:
- Click on the Proposal Automation tab
- Select the Exact Match Filter
- Select the answers you want to reuse


To save the selected answers, press the button in the bottom right:

Option 2 (Per Question)
Alternatively you can also retrieve stored answers on a per-question basis as follows:
- Start editing the question
- In the right sidebar select "Knowledge Library"
- Click on Use Response

How Can I Ask Questions Regarding a Tender?
We ask you to run the tender-specific questions centrally via the platform.
It is possible to send a question directly to the CyberCompare team for a single question. For that, please select a question. On the right side, inside the details tab, you have the option to send us a message.

There is also the option to send a message to CyberCompare or view the conversation in the dashboard via Messages.

How to Export the Tender/Specification
These export options are designed to offer you flexibility and convenience so that you can easily process the information you have collected.
This allows you to easily compare and harmonize the resulting offer with the information in the tender.
Proposal Template is the preferred solution and delivers better results than Excel. Keep the default settings if possible.


